App Setup
Setting up your wasserleser.reed is done through the energieleser app. Simply follow the steps below in the order shown.
Important
During setup, you will be asked to select your device type. Choose wasserleser from the list.
Setup Steps
Follow these steps to set up your wasserleser.reed:
- Download App – Download the energieleser app to your smartphone
- Create Account – Create your user account
- Select Device Type – Choose wasserleser as your device type
- Bluetooth Pairing – Connect your device via Bluetooth
- WiFi Configuration – Set up the WiFi connection
- Complete Pairing – Finish the setup
- Adjust Device Settings – Switch sensor mode
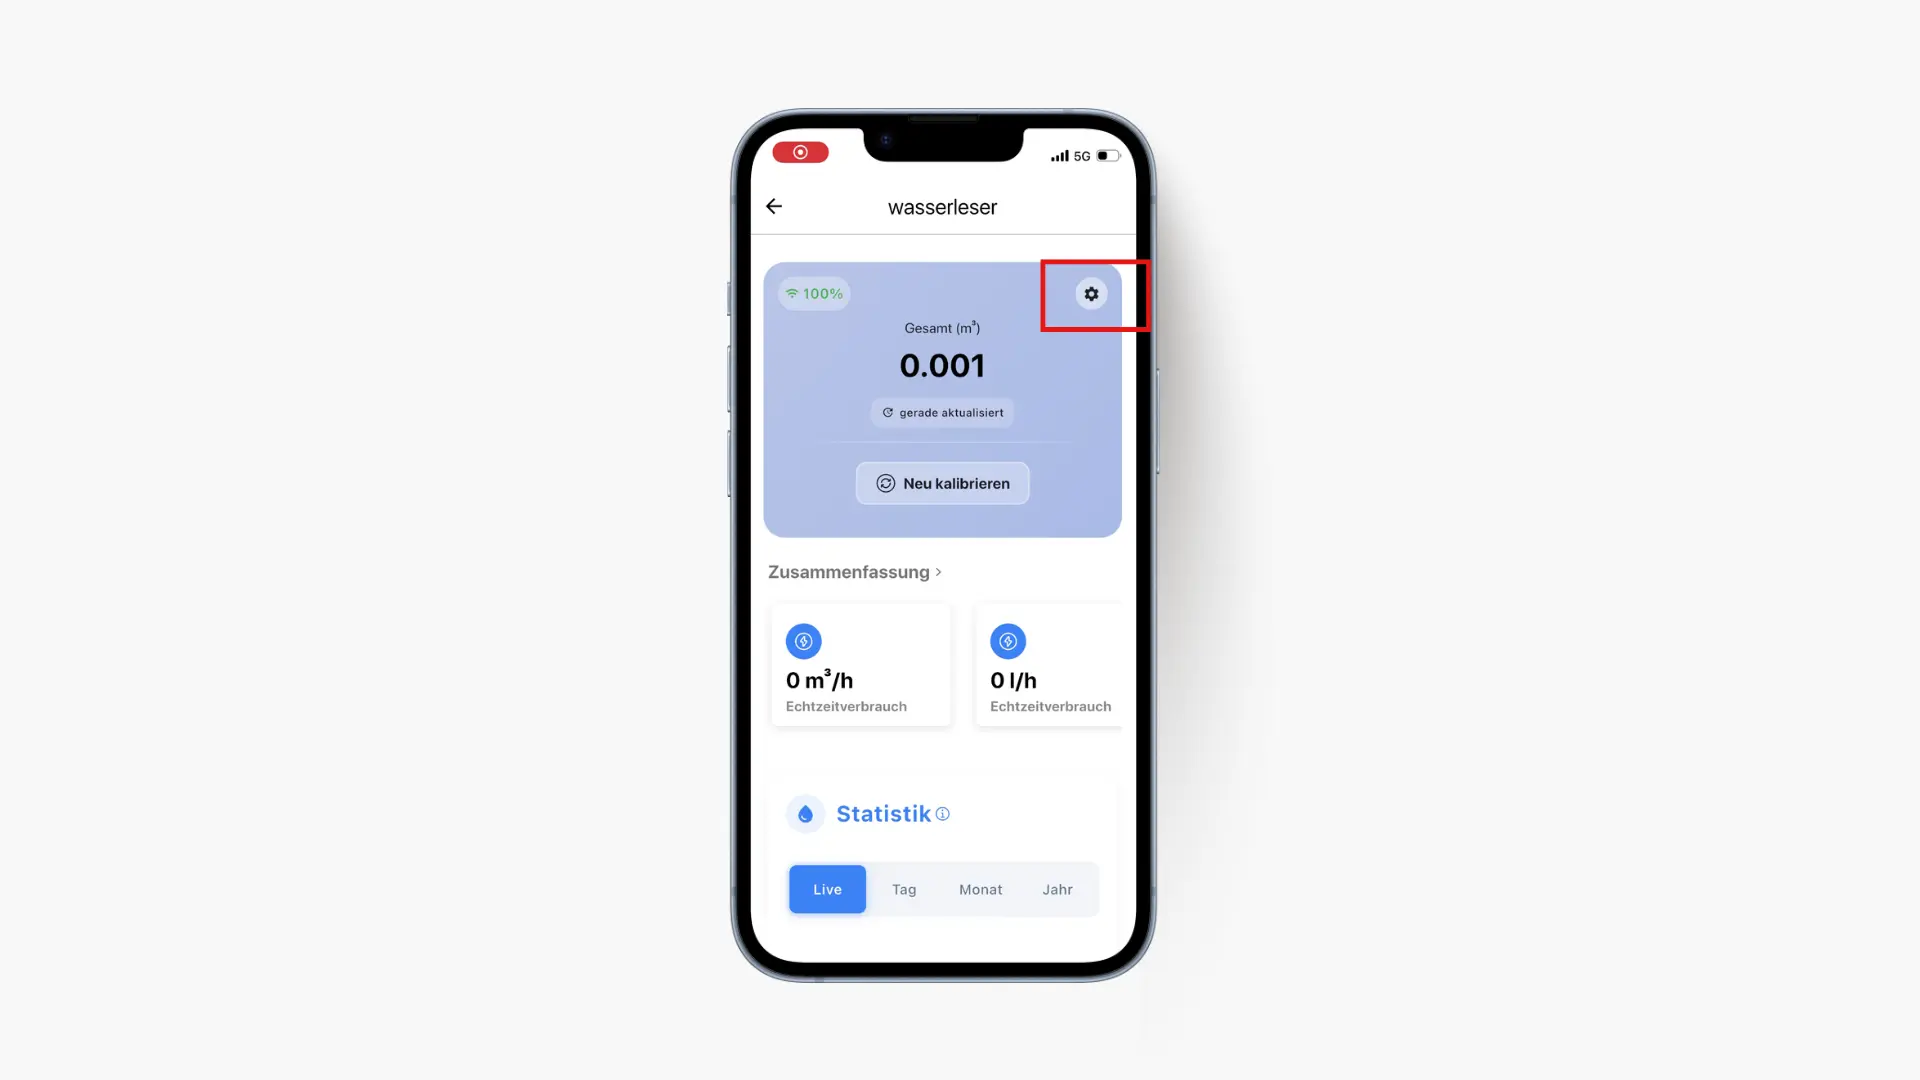
Step 7: Adjust Device Settings
7.1 Open the device settings of your wasserleser
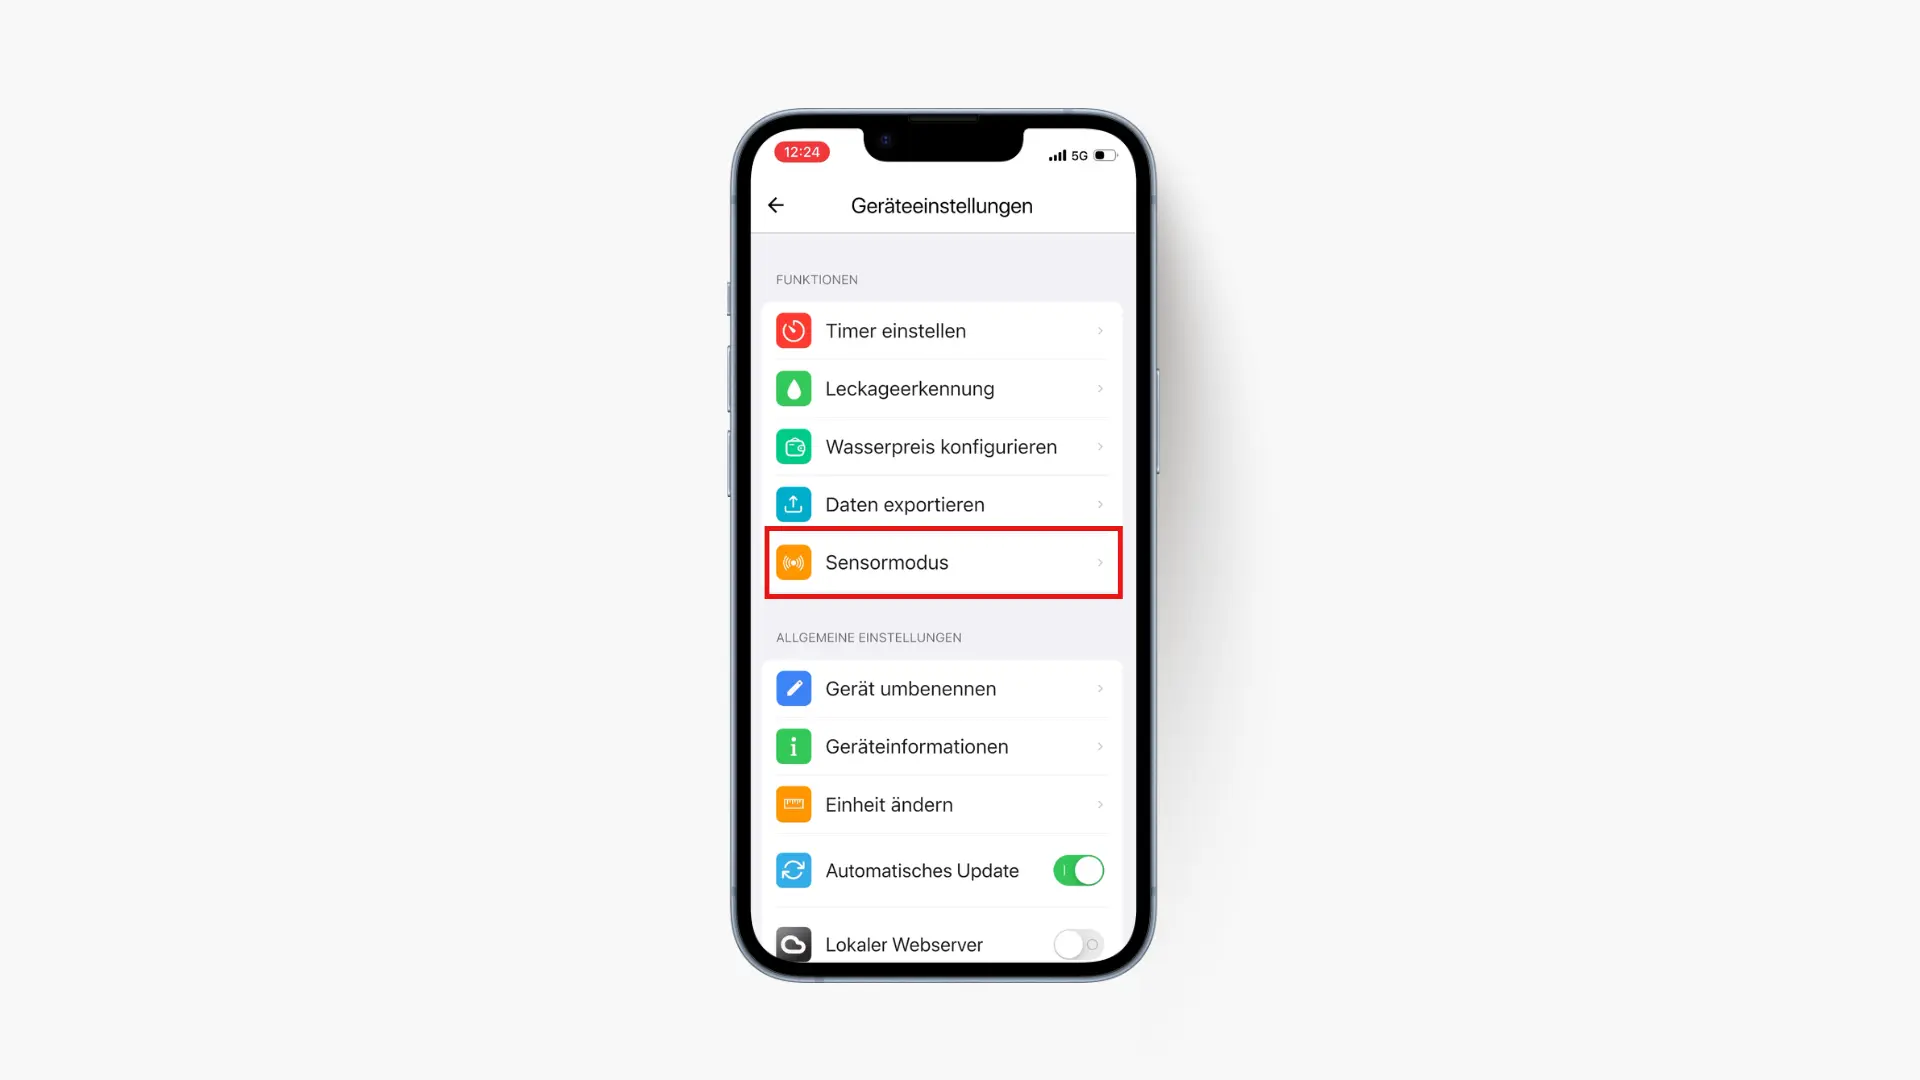
7.2 Select Sensor Mode
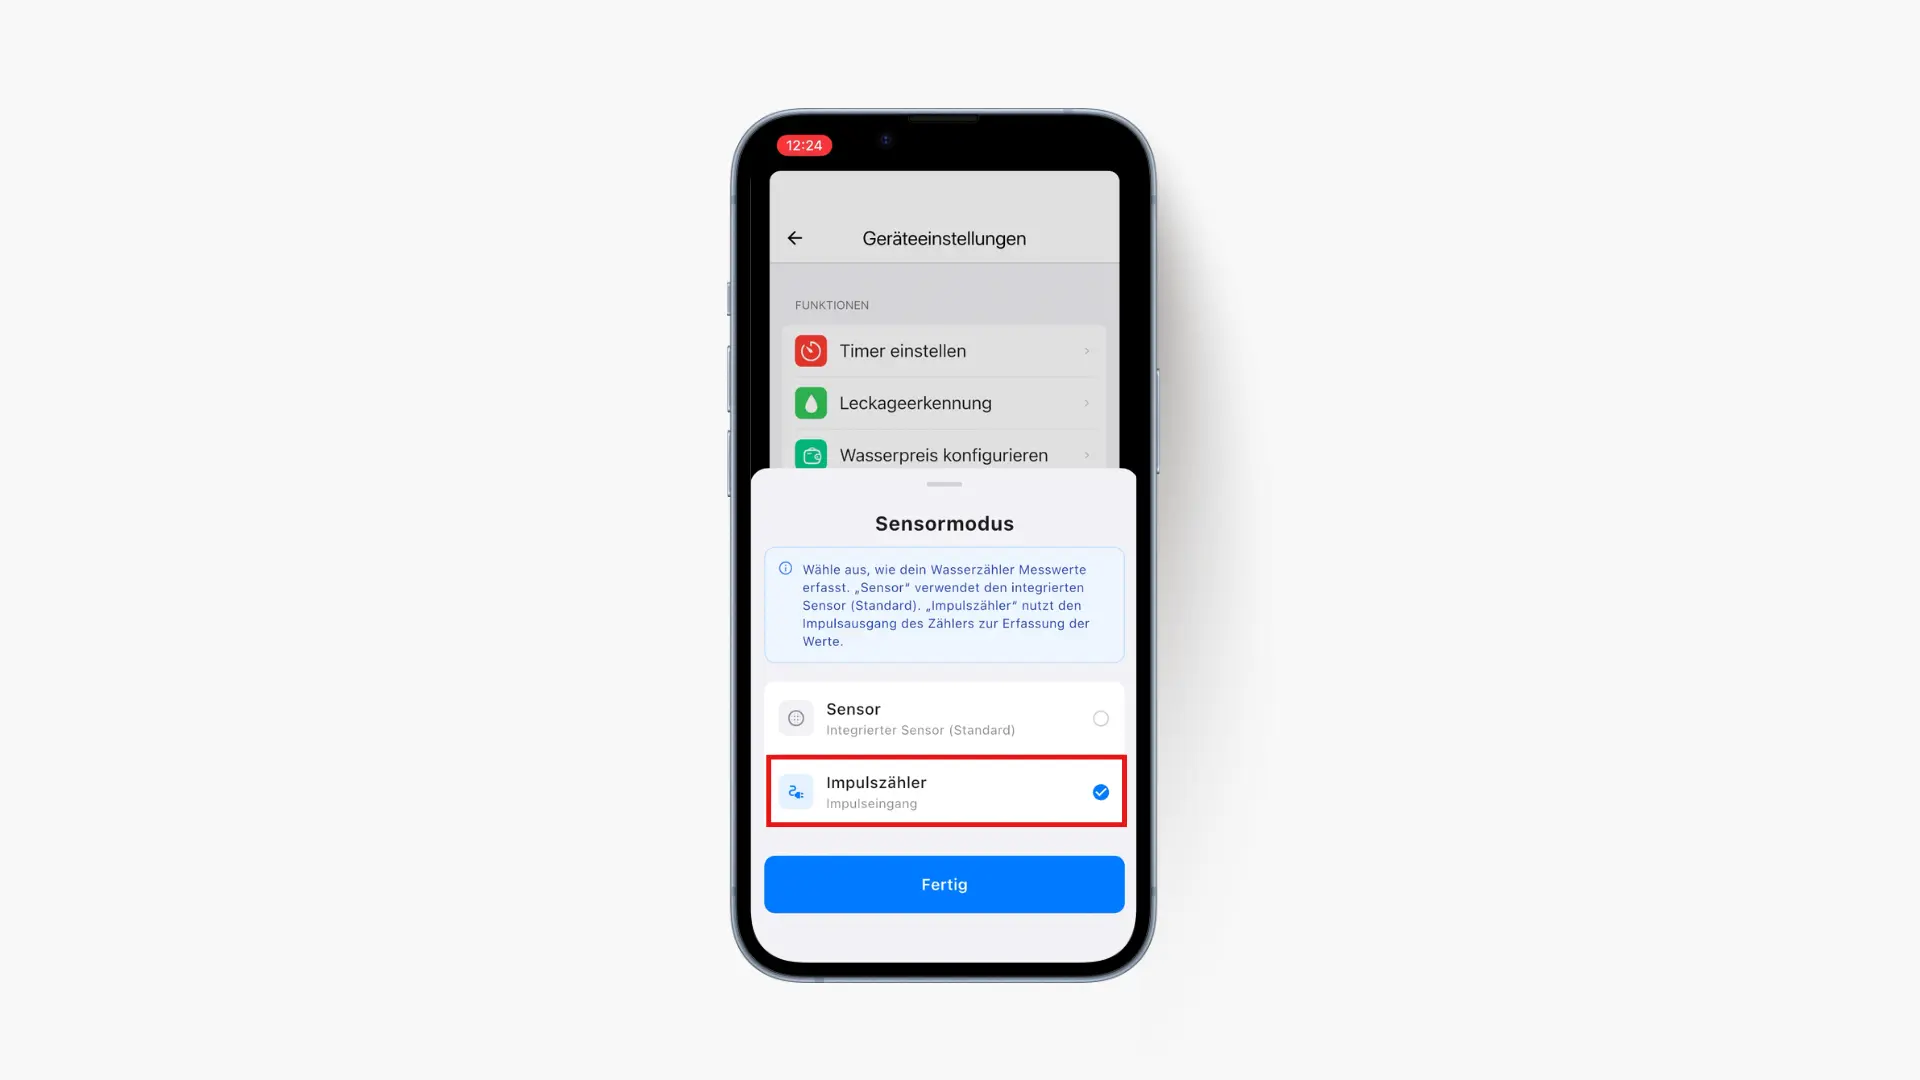
7.3 Switch the sensor mode to "Pulse Counter"
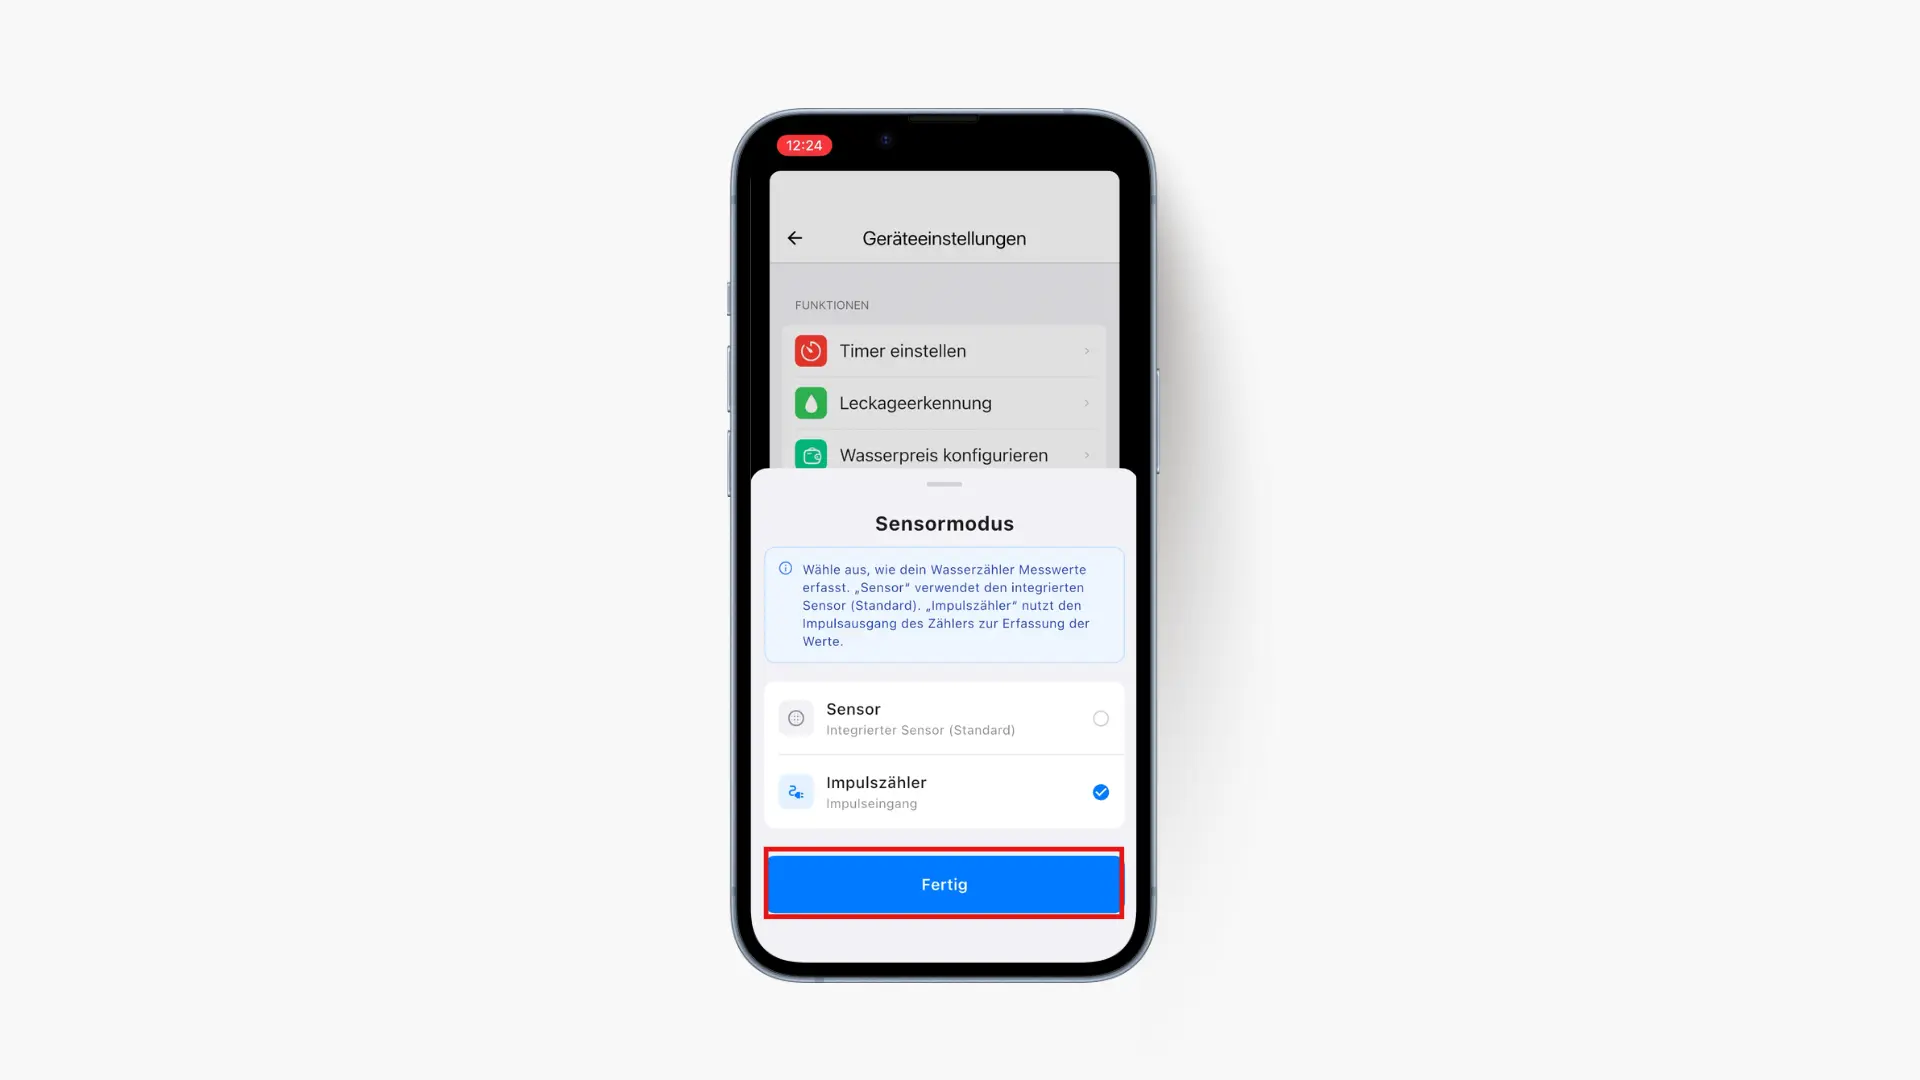
7.4 Tap Done to save the setting. Consumption data can now be read from your reed contact.
Tip
The entire setup takes about 10–15 minutes. Make sure you are near your WiFi router and your water meter.
LED Indicators During Setup
- Green blinking: Device is connecting to WiFi
- Blue blinking: Device successfully connected and detecting water flow
- Red blinking: Connection failed, please retry
Troubleshooting Connection Issues
If the LED blinks red (connection failed):
- Wait a few seconds
- Disconnect the wasserleser from power
- Reconnect and restart the setup process
- If the problem persists, perform a factory reset (see LED Indicators)