myPV Integration
This integration lets you connect your stromleser.one directly to your myPV device. Your stromleser.one then sends the surplus power to your myPV device so it can use your excess solar power for hot water or heating.
This integration is only available for stromleser.one devices.
Compatible myPV devices
The following myPV devices are supported by this integration:
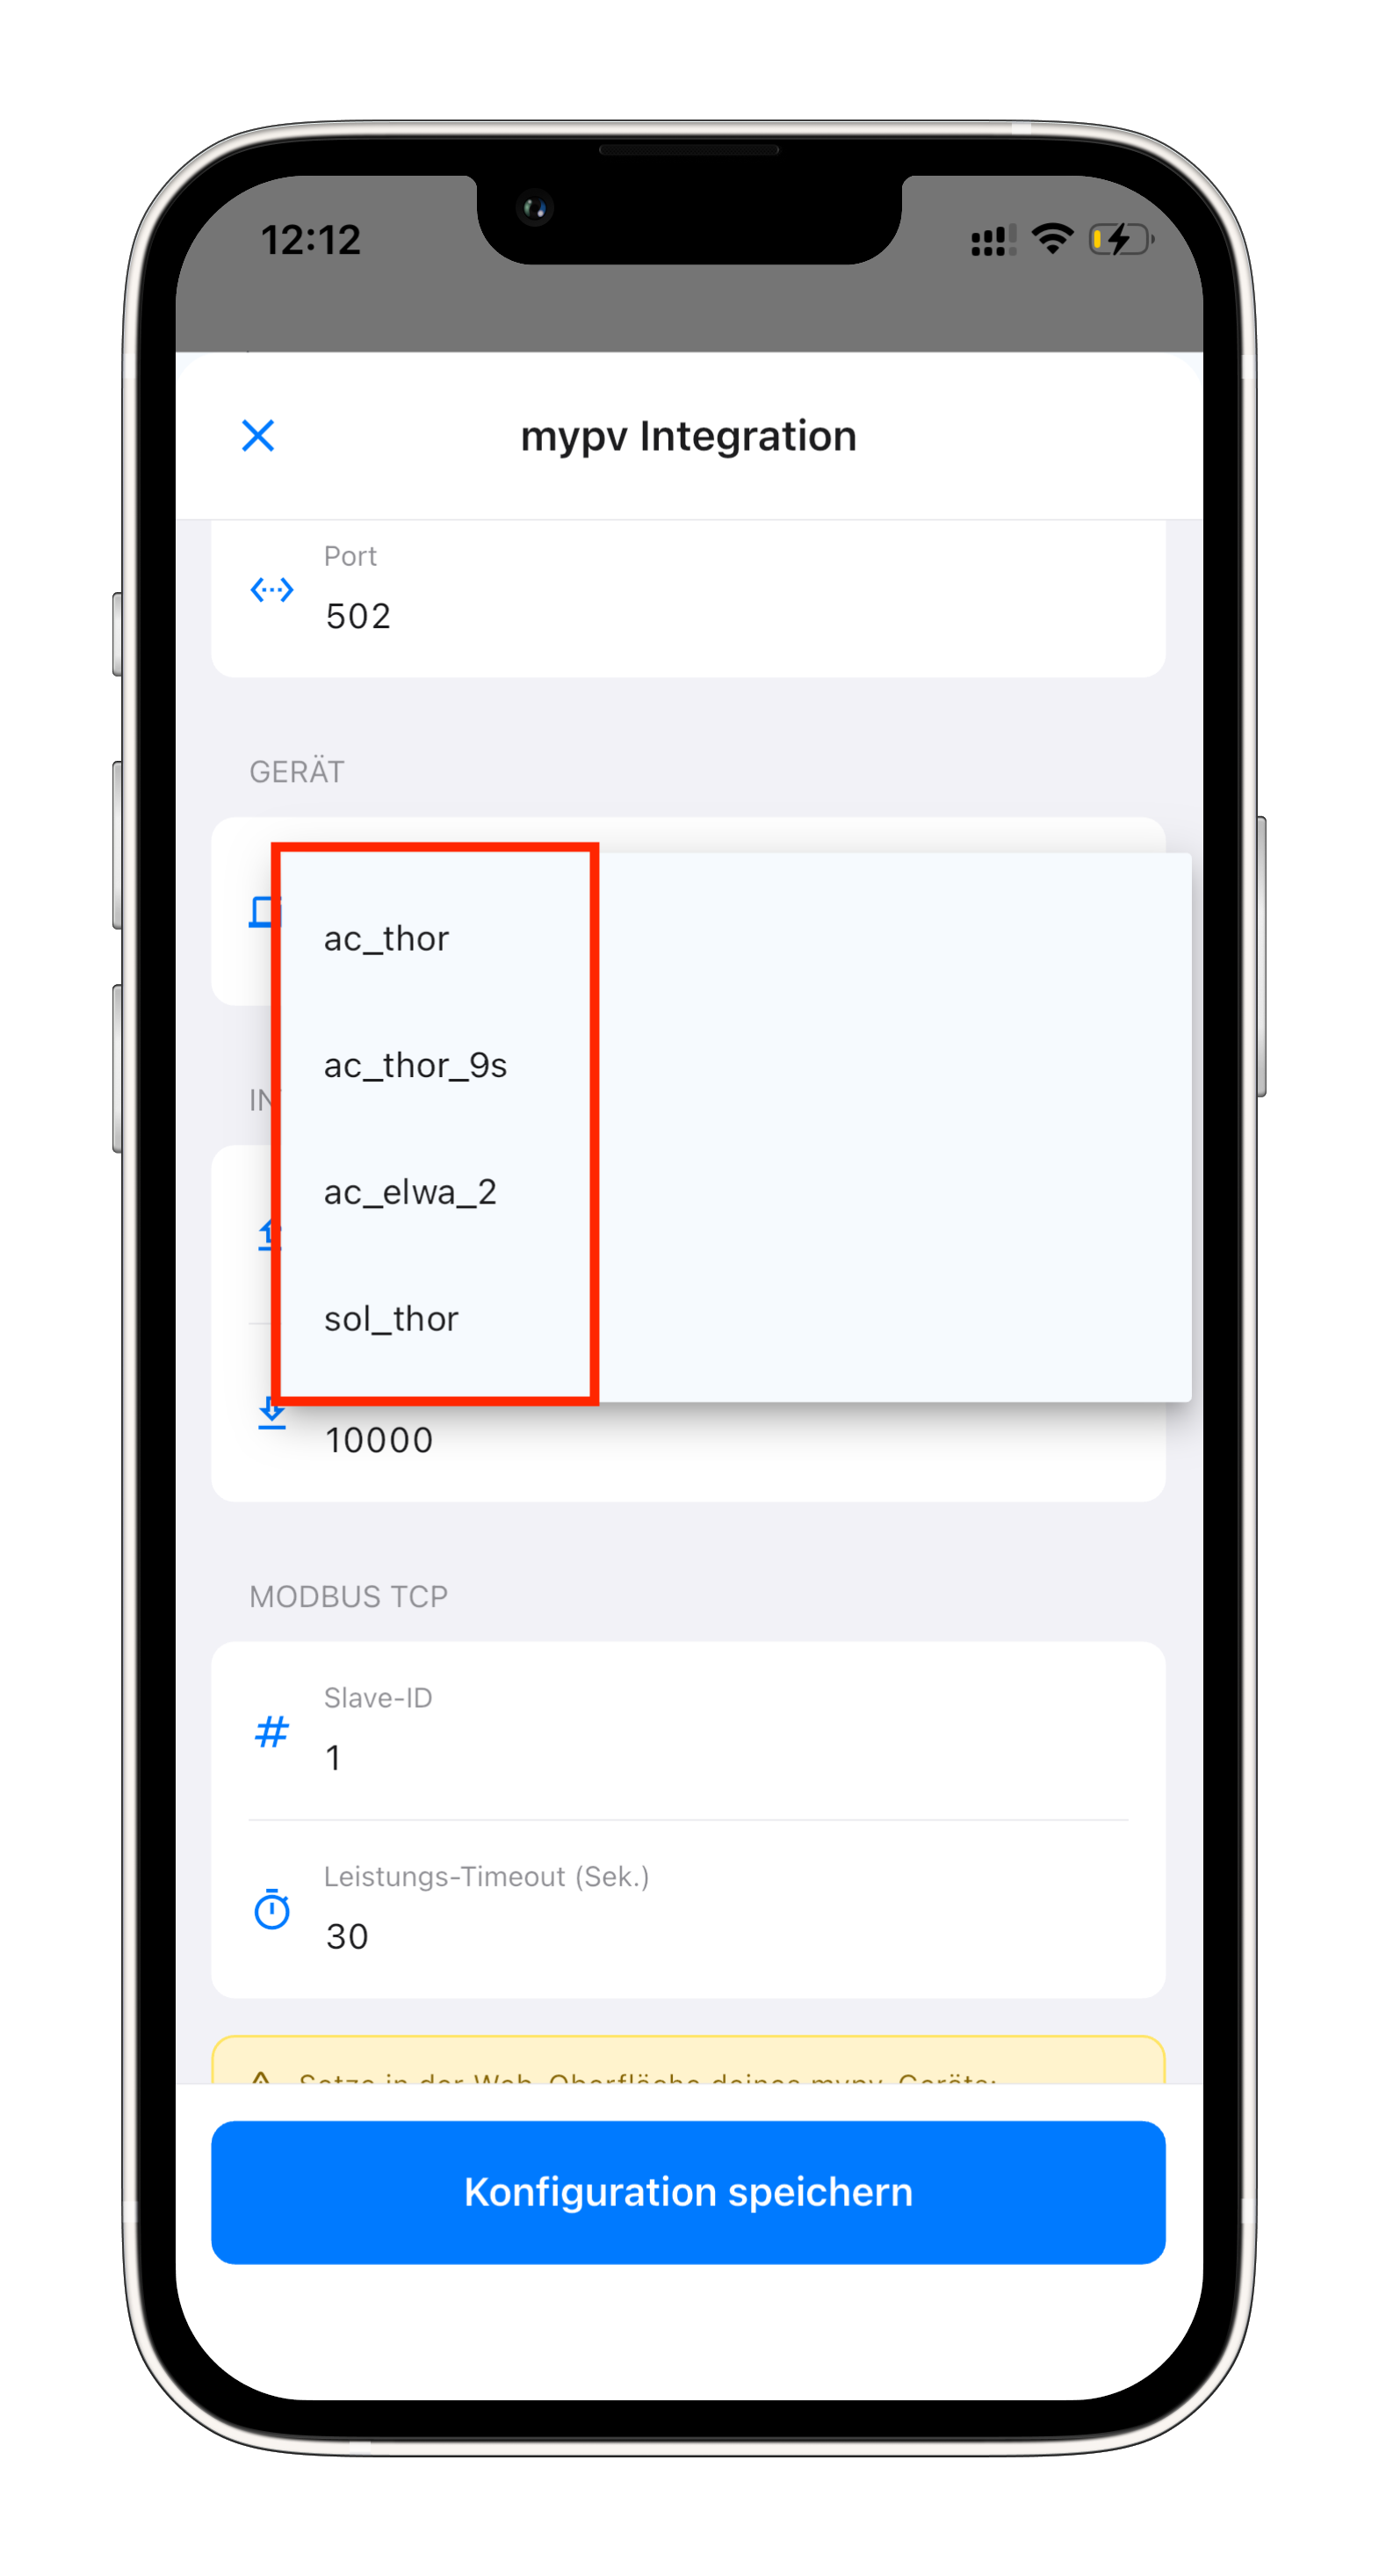
- AC THOR (
ac_thor) - AC THOR 9s (
ac_thor_9s) - AC ELWA 2 (
ac_elwa_2) - SOL-THOR (
sol_thor)
Requirements
Before you start the setup, make sure that:
- your stromleser.one is installed at the meter and set up in the energieleser app
- your myPV device is fully installed and connected to your network
- your stromleser.one and your myPV device are on the same network
Find the host address of your myPV device
For the setup you need the host address (IP address) of your myPV device. You can easily find it in the device management dashboard (web interface) of your myPV device.
Make a note of the IP address — you will need it below in Step 5.
Step 1: Open Integrations
- Open the energieleser app
- Go to Settings via the navigation bar
- Tap Integrations
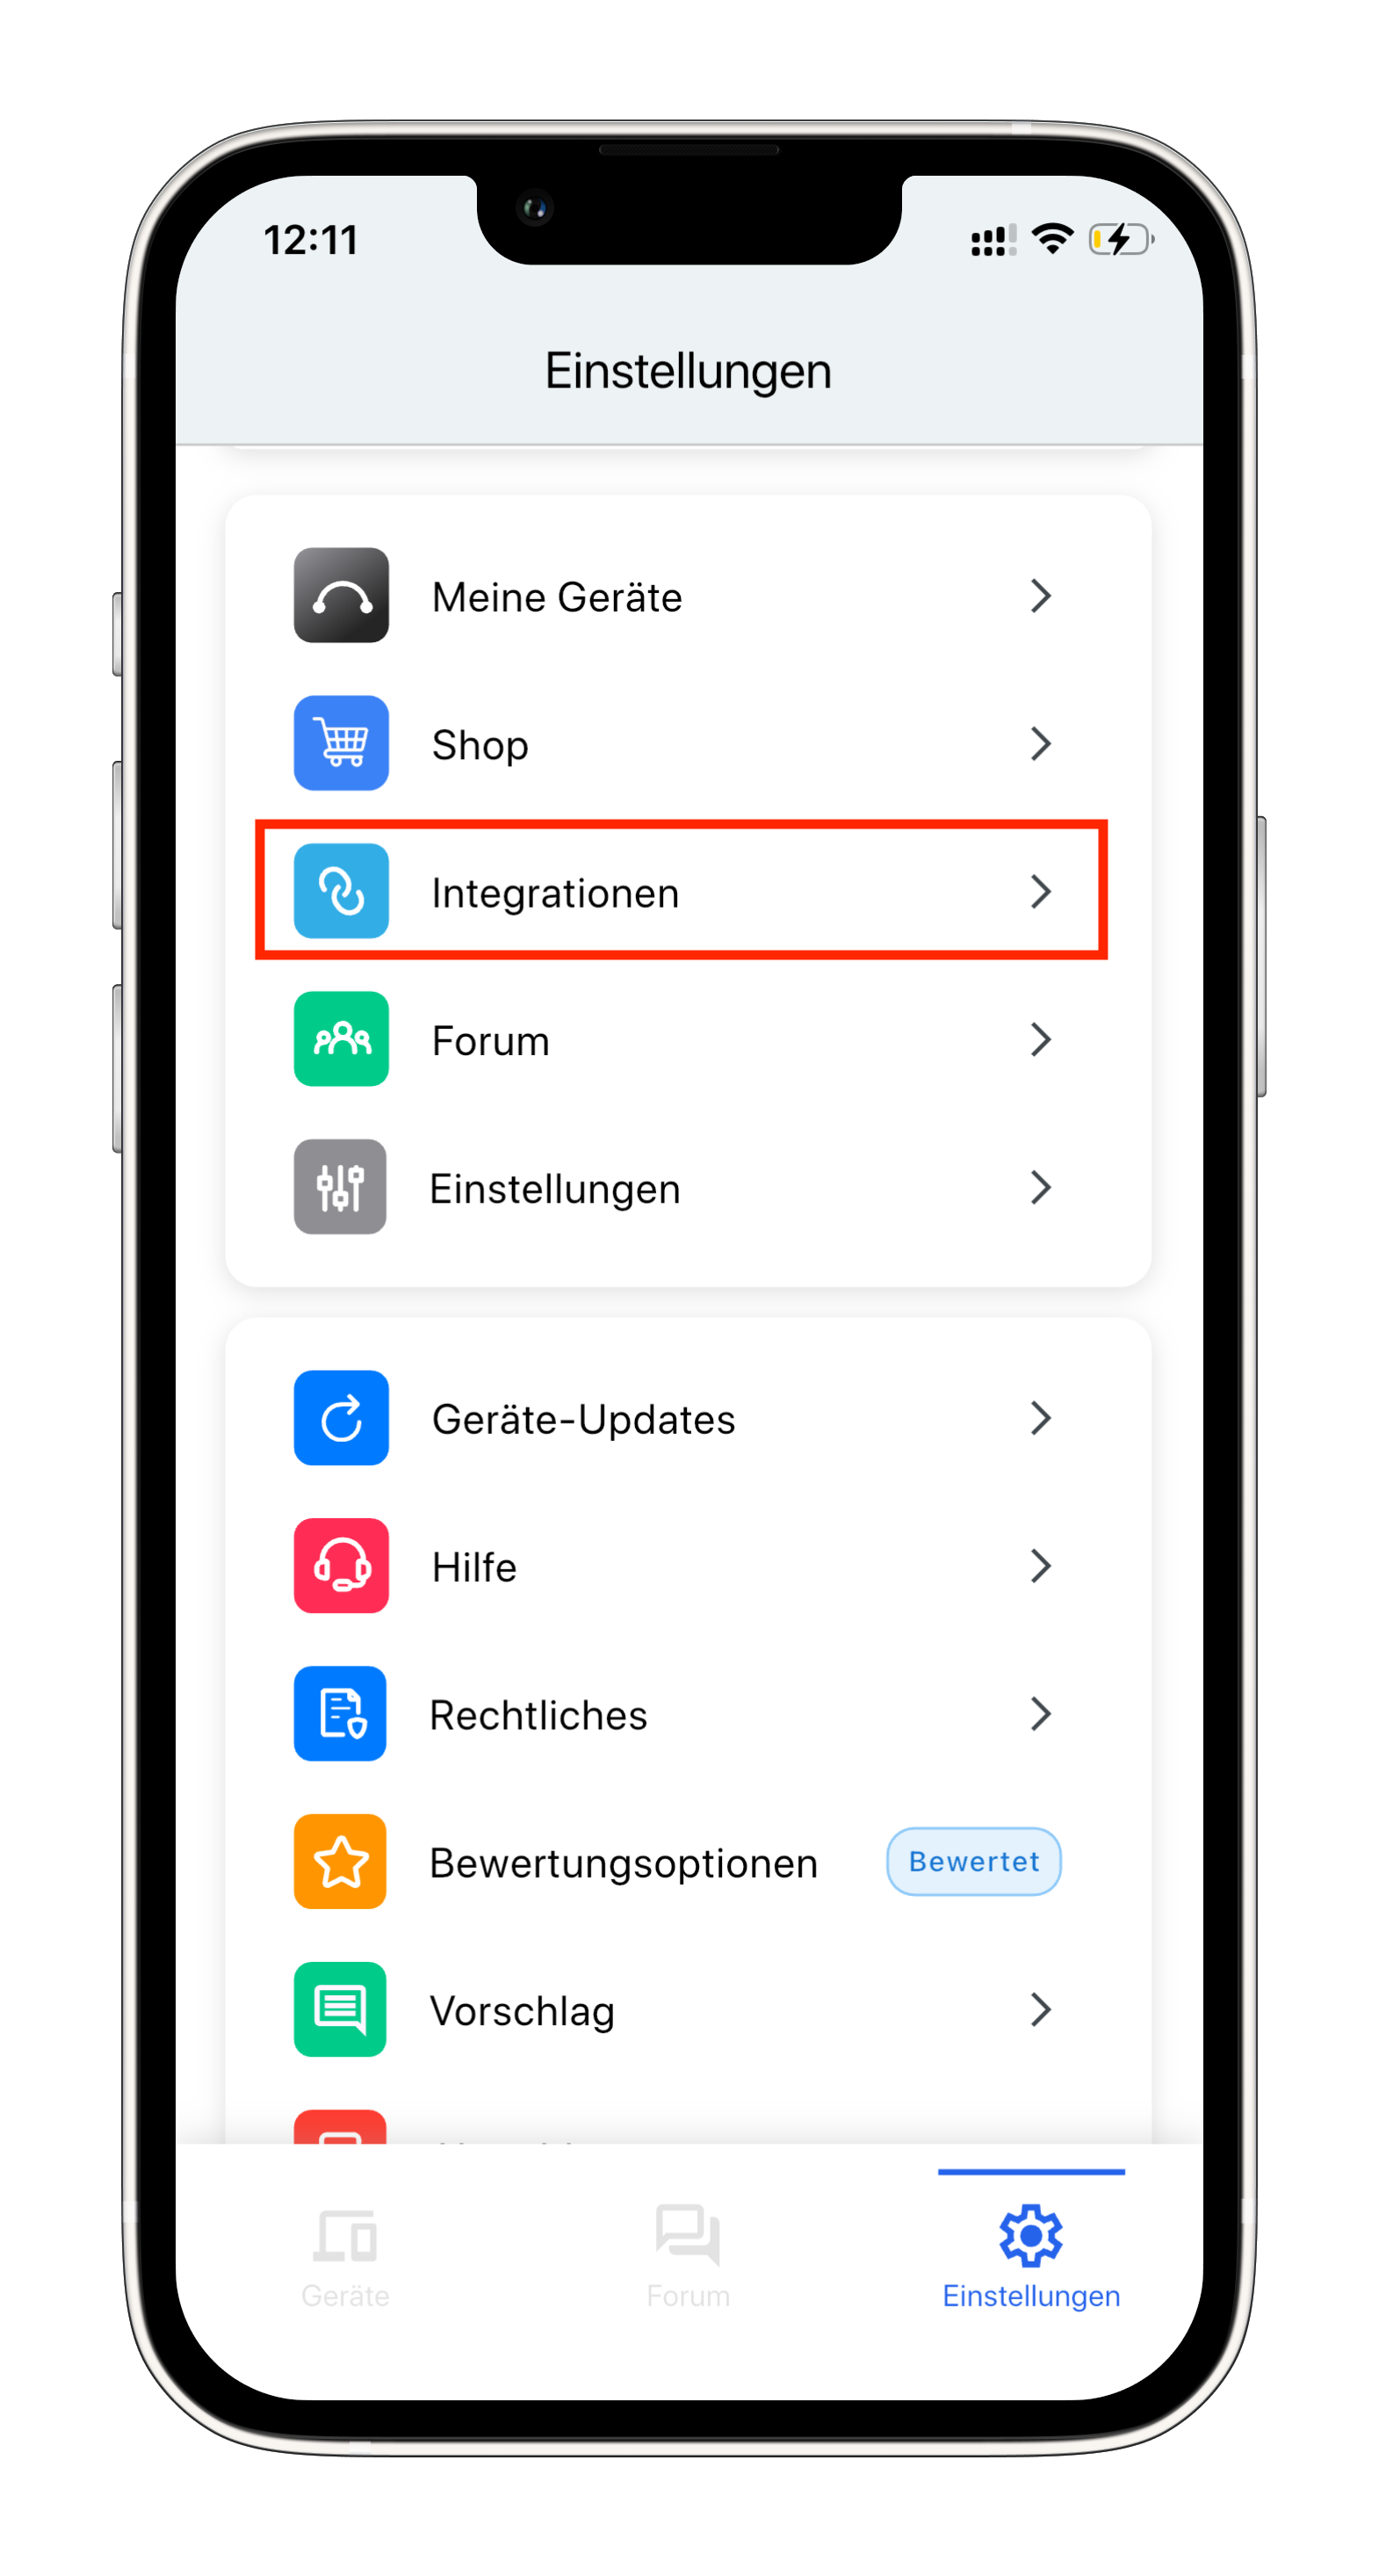
Step 2: Select myPV
- Select myPV from the list of available integrations

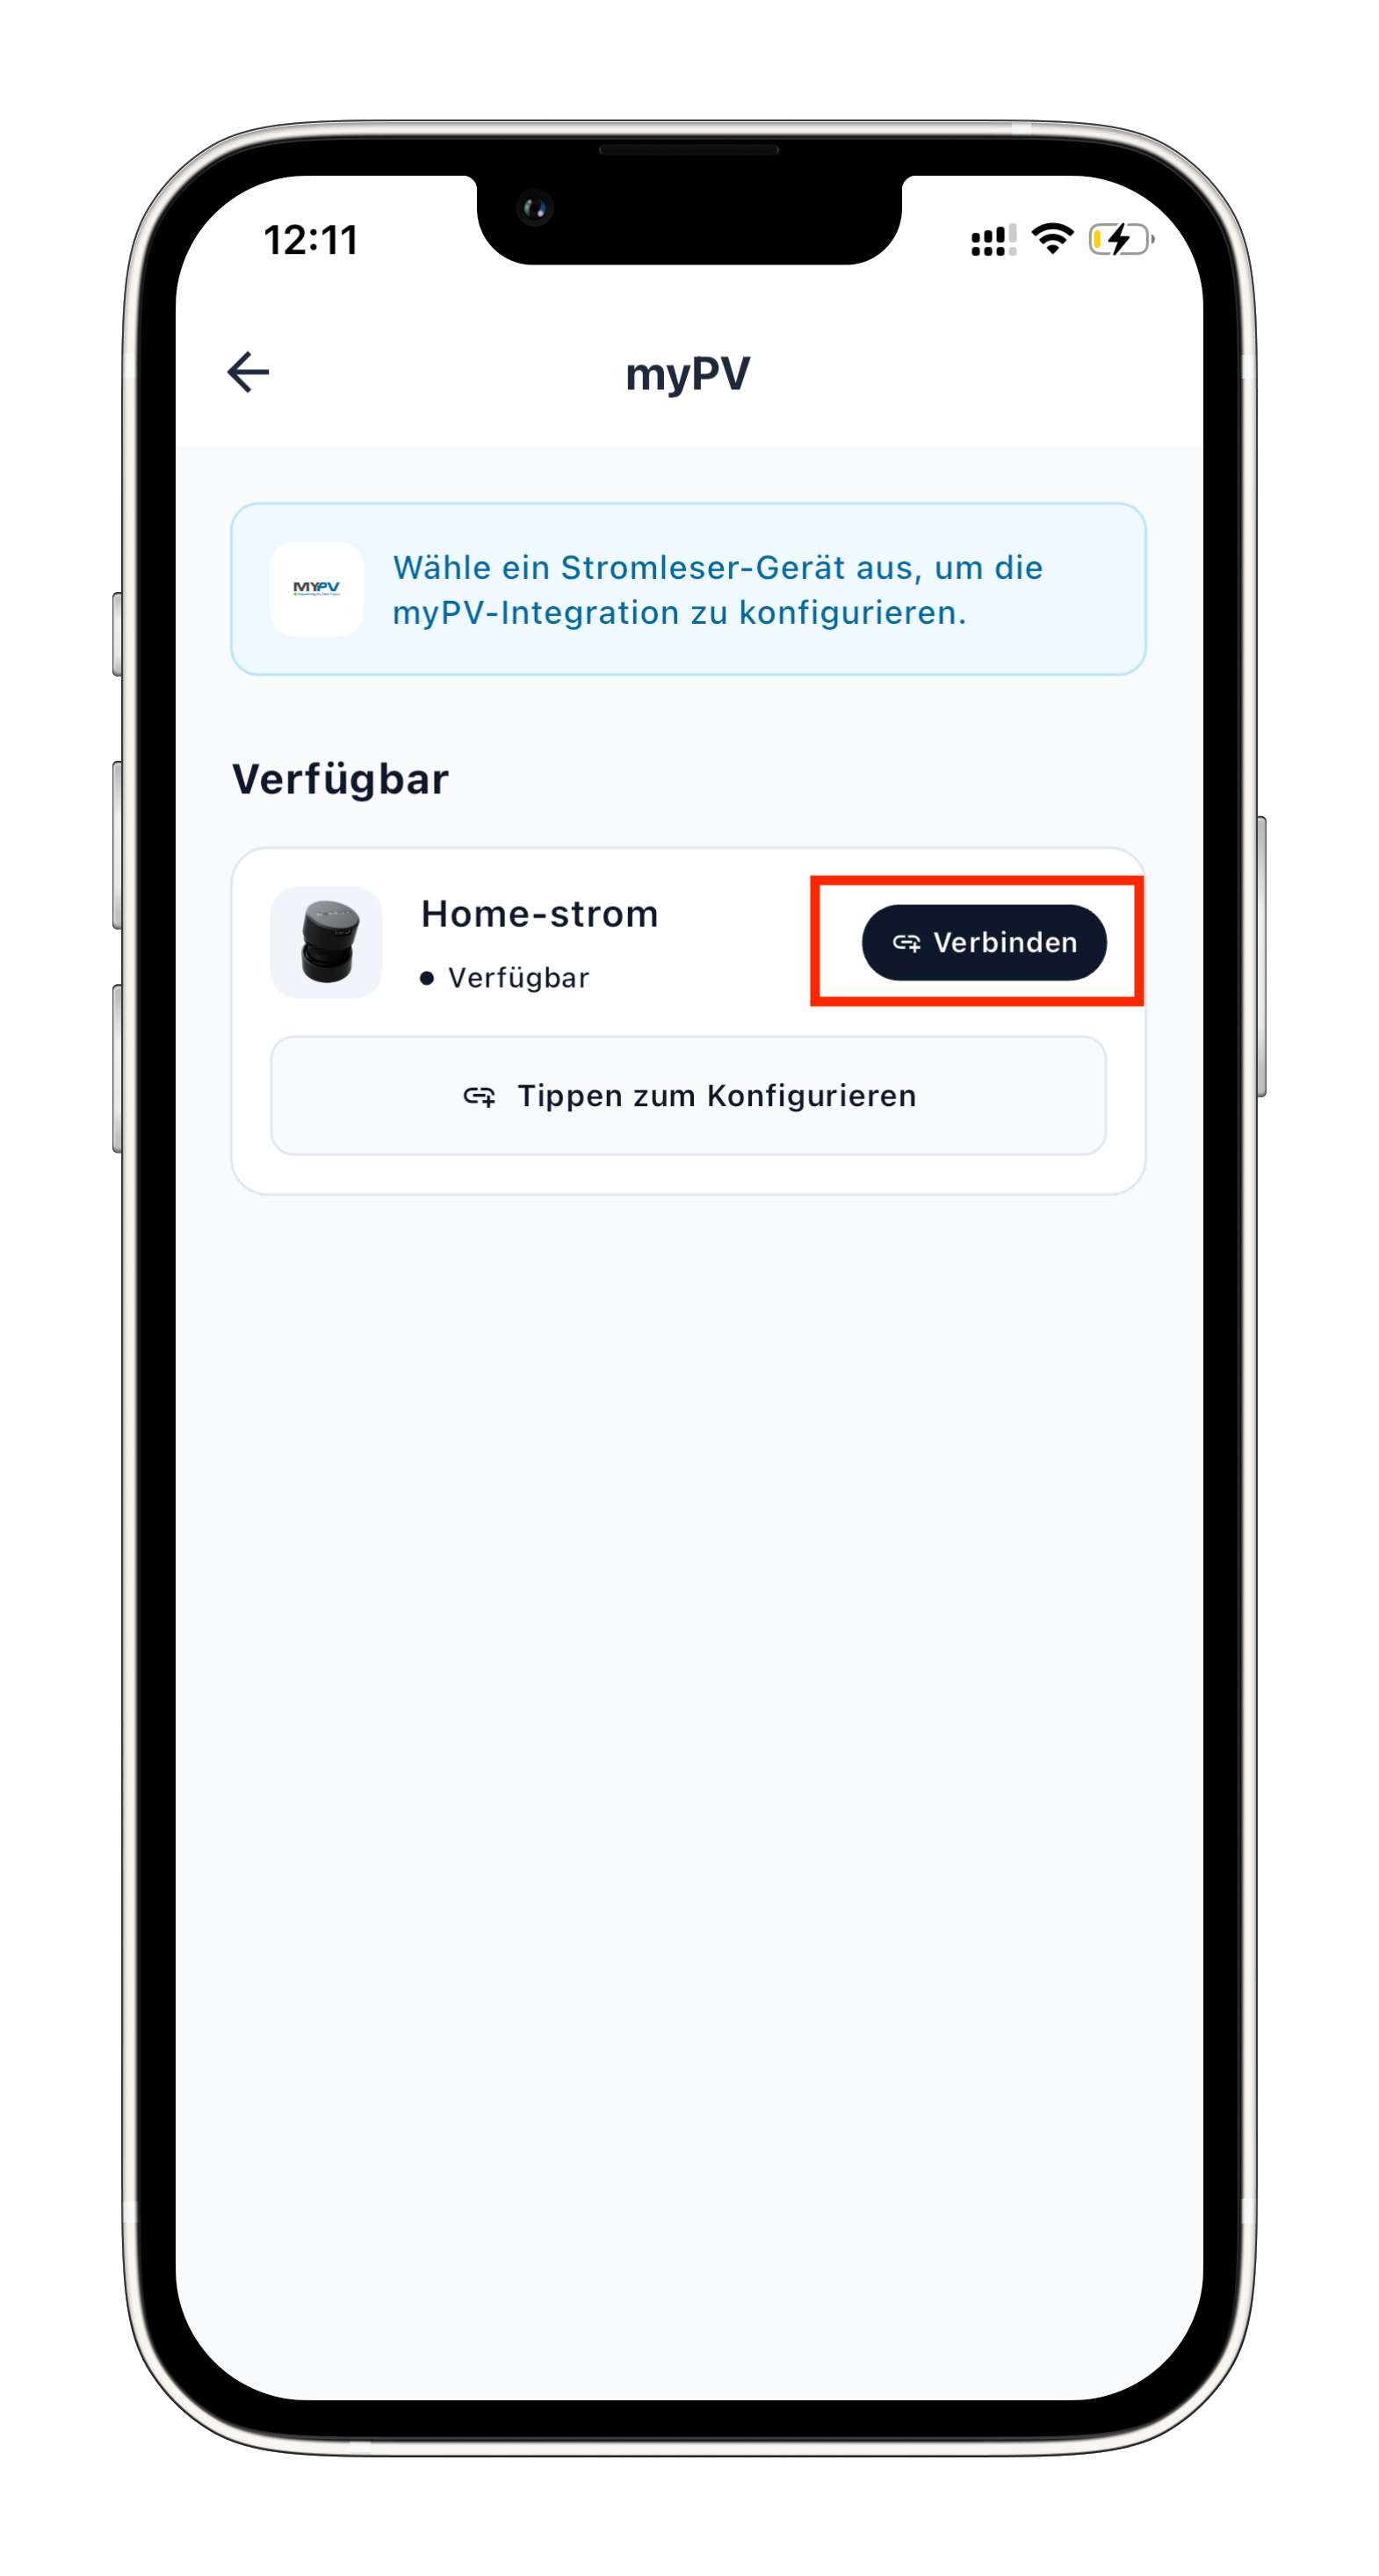
Step 3: Select the stromleser.one device to configure
- Select the stromleser.one device you want to connect to myPV
- Tap Tap to configure
Step 4: Enable the integration and choose a protocol
- Under STATUS, enable the mypv Integration using the toggle
- Under CONNECTION, choose the desired protocol:
- http
- modbus_tcp
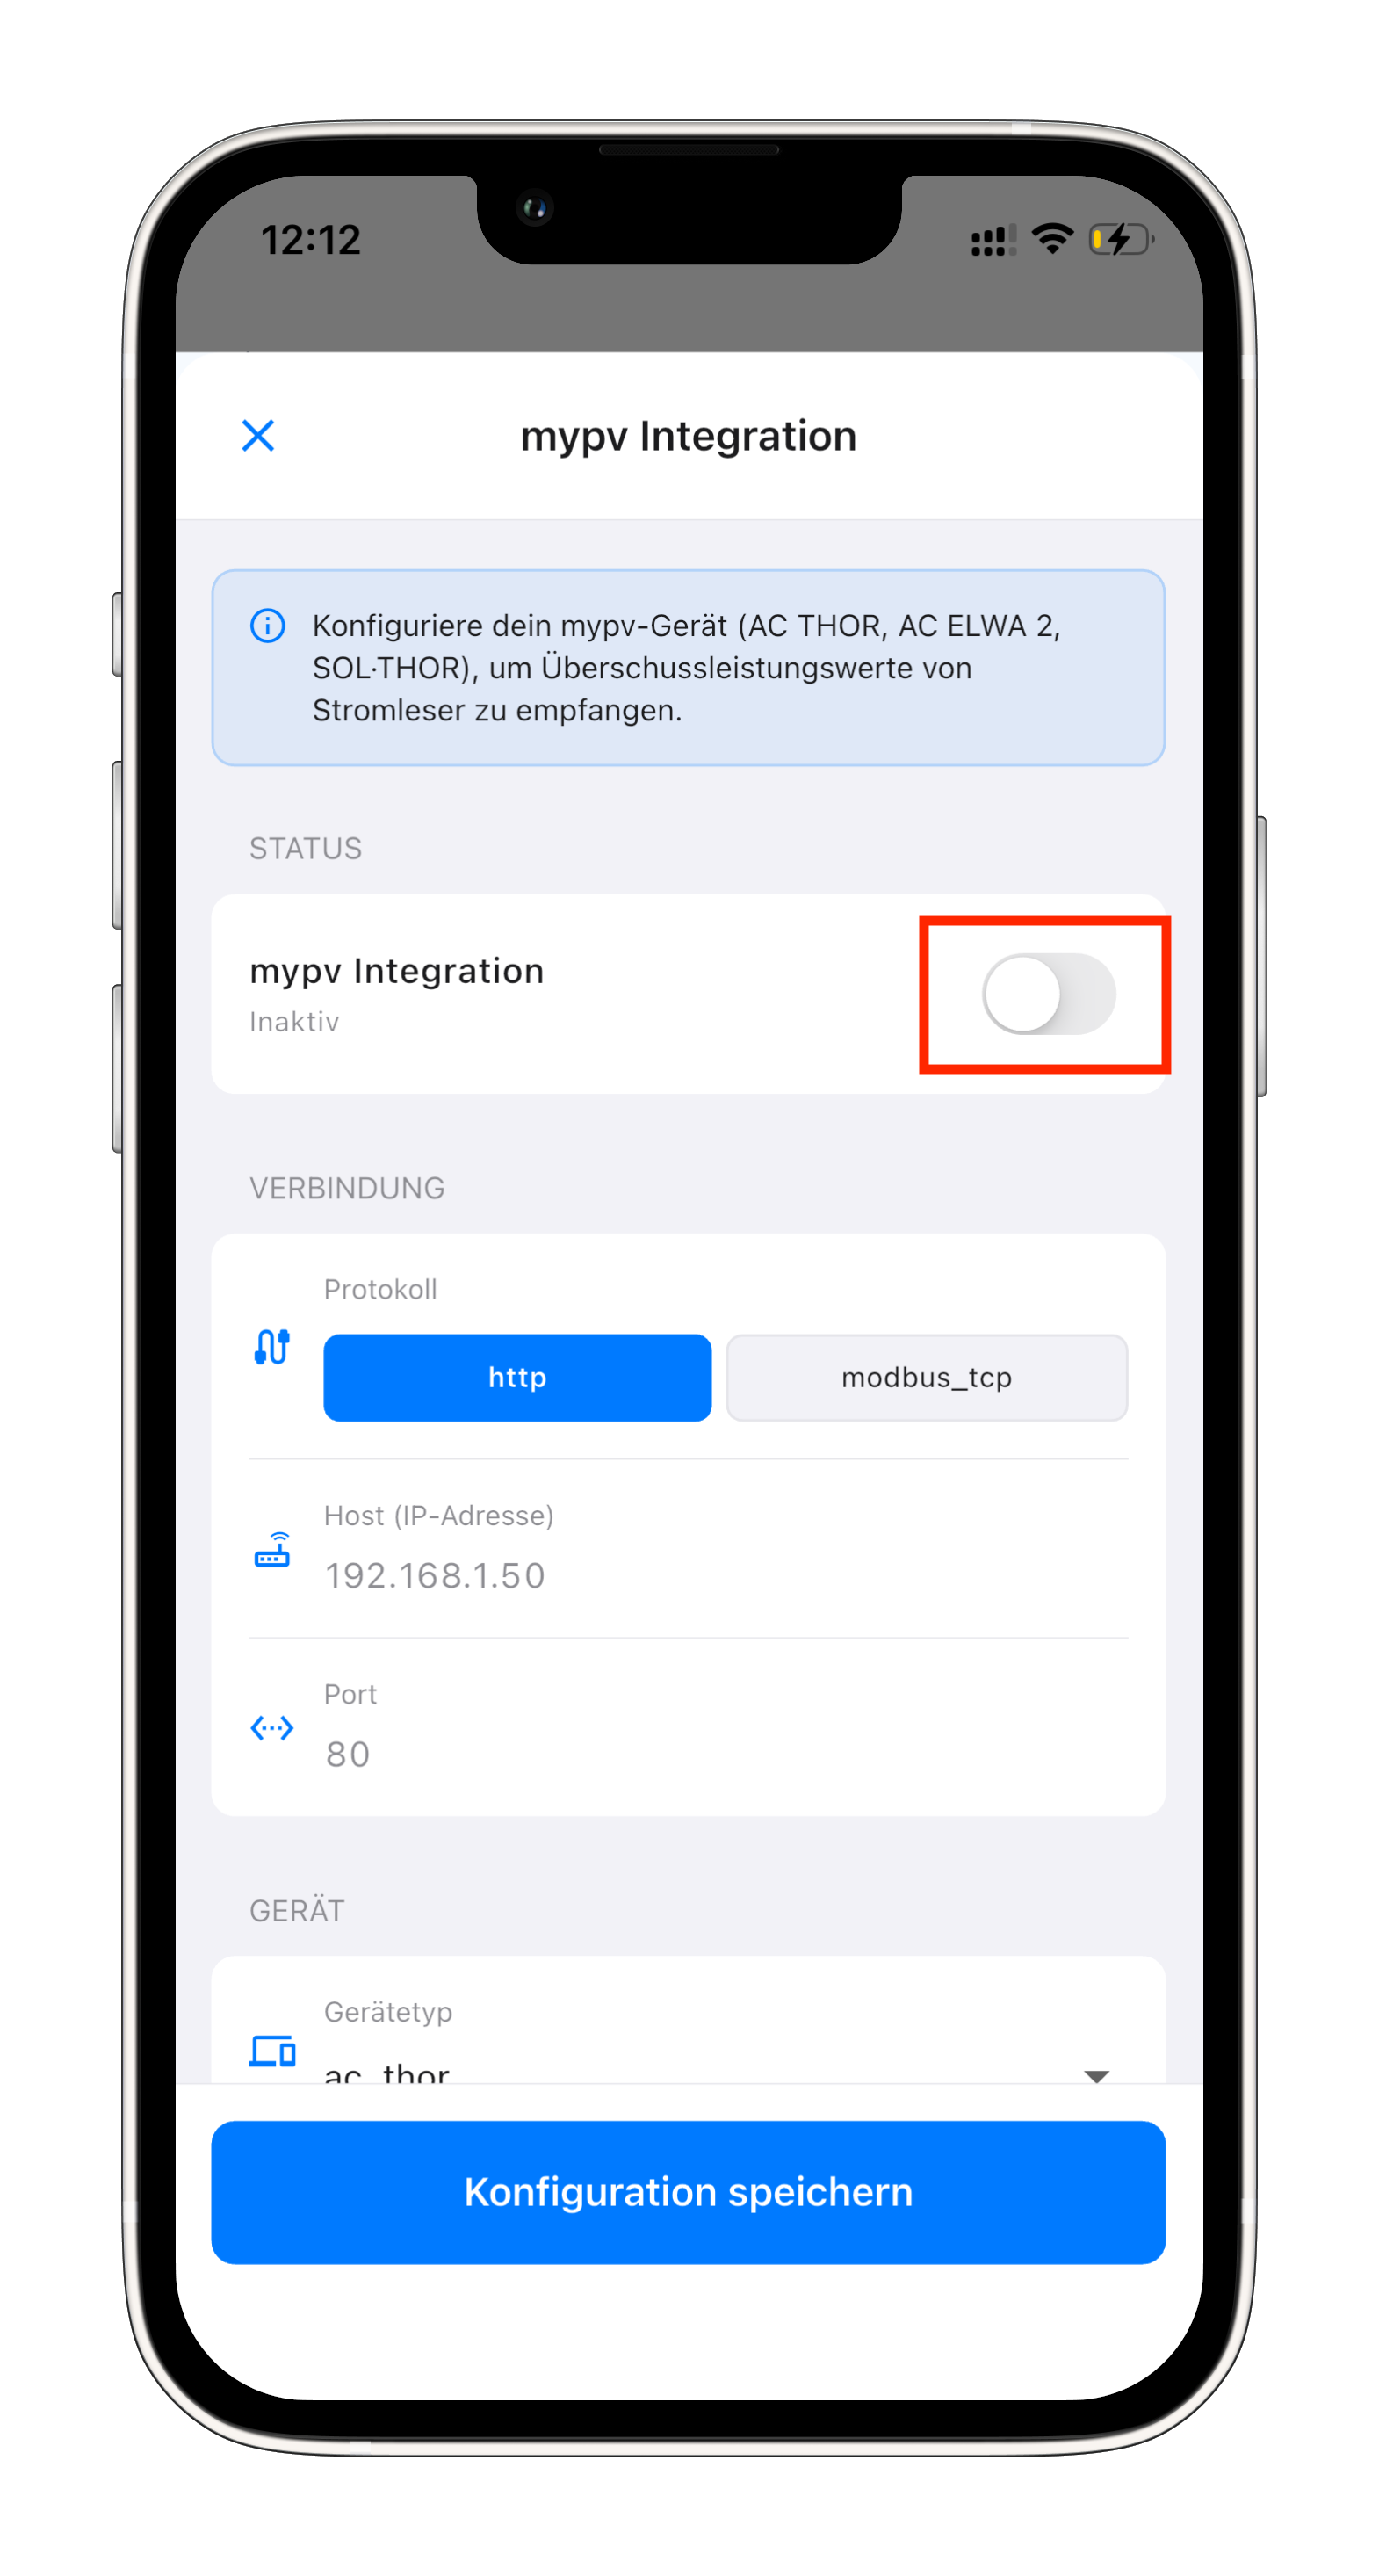
Both protocols work. http uses port 80 by default, while modbus_tcp uses port 502.
Step 5: Enter the host address (IP)
- Under Host (IP address), enter the IP address of your myPV device (e.g.
192.168.1.50) - The port is filled in automatically based on the selected protocol (http:
80)
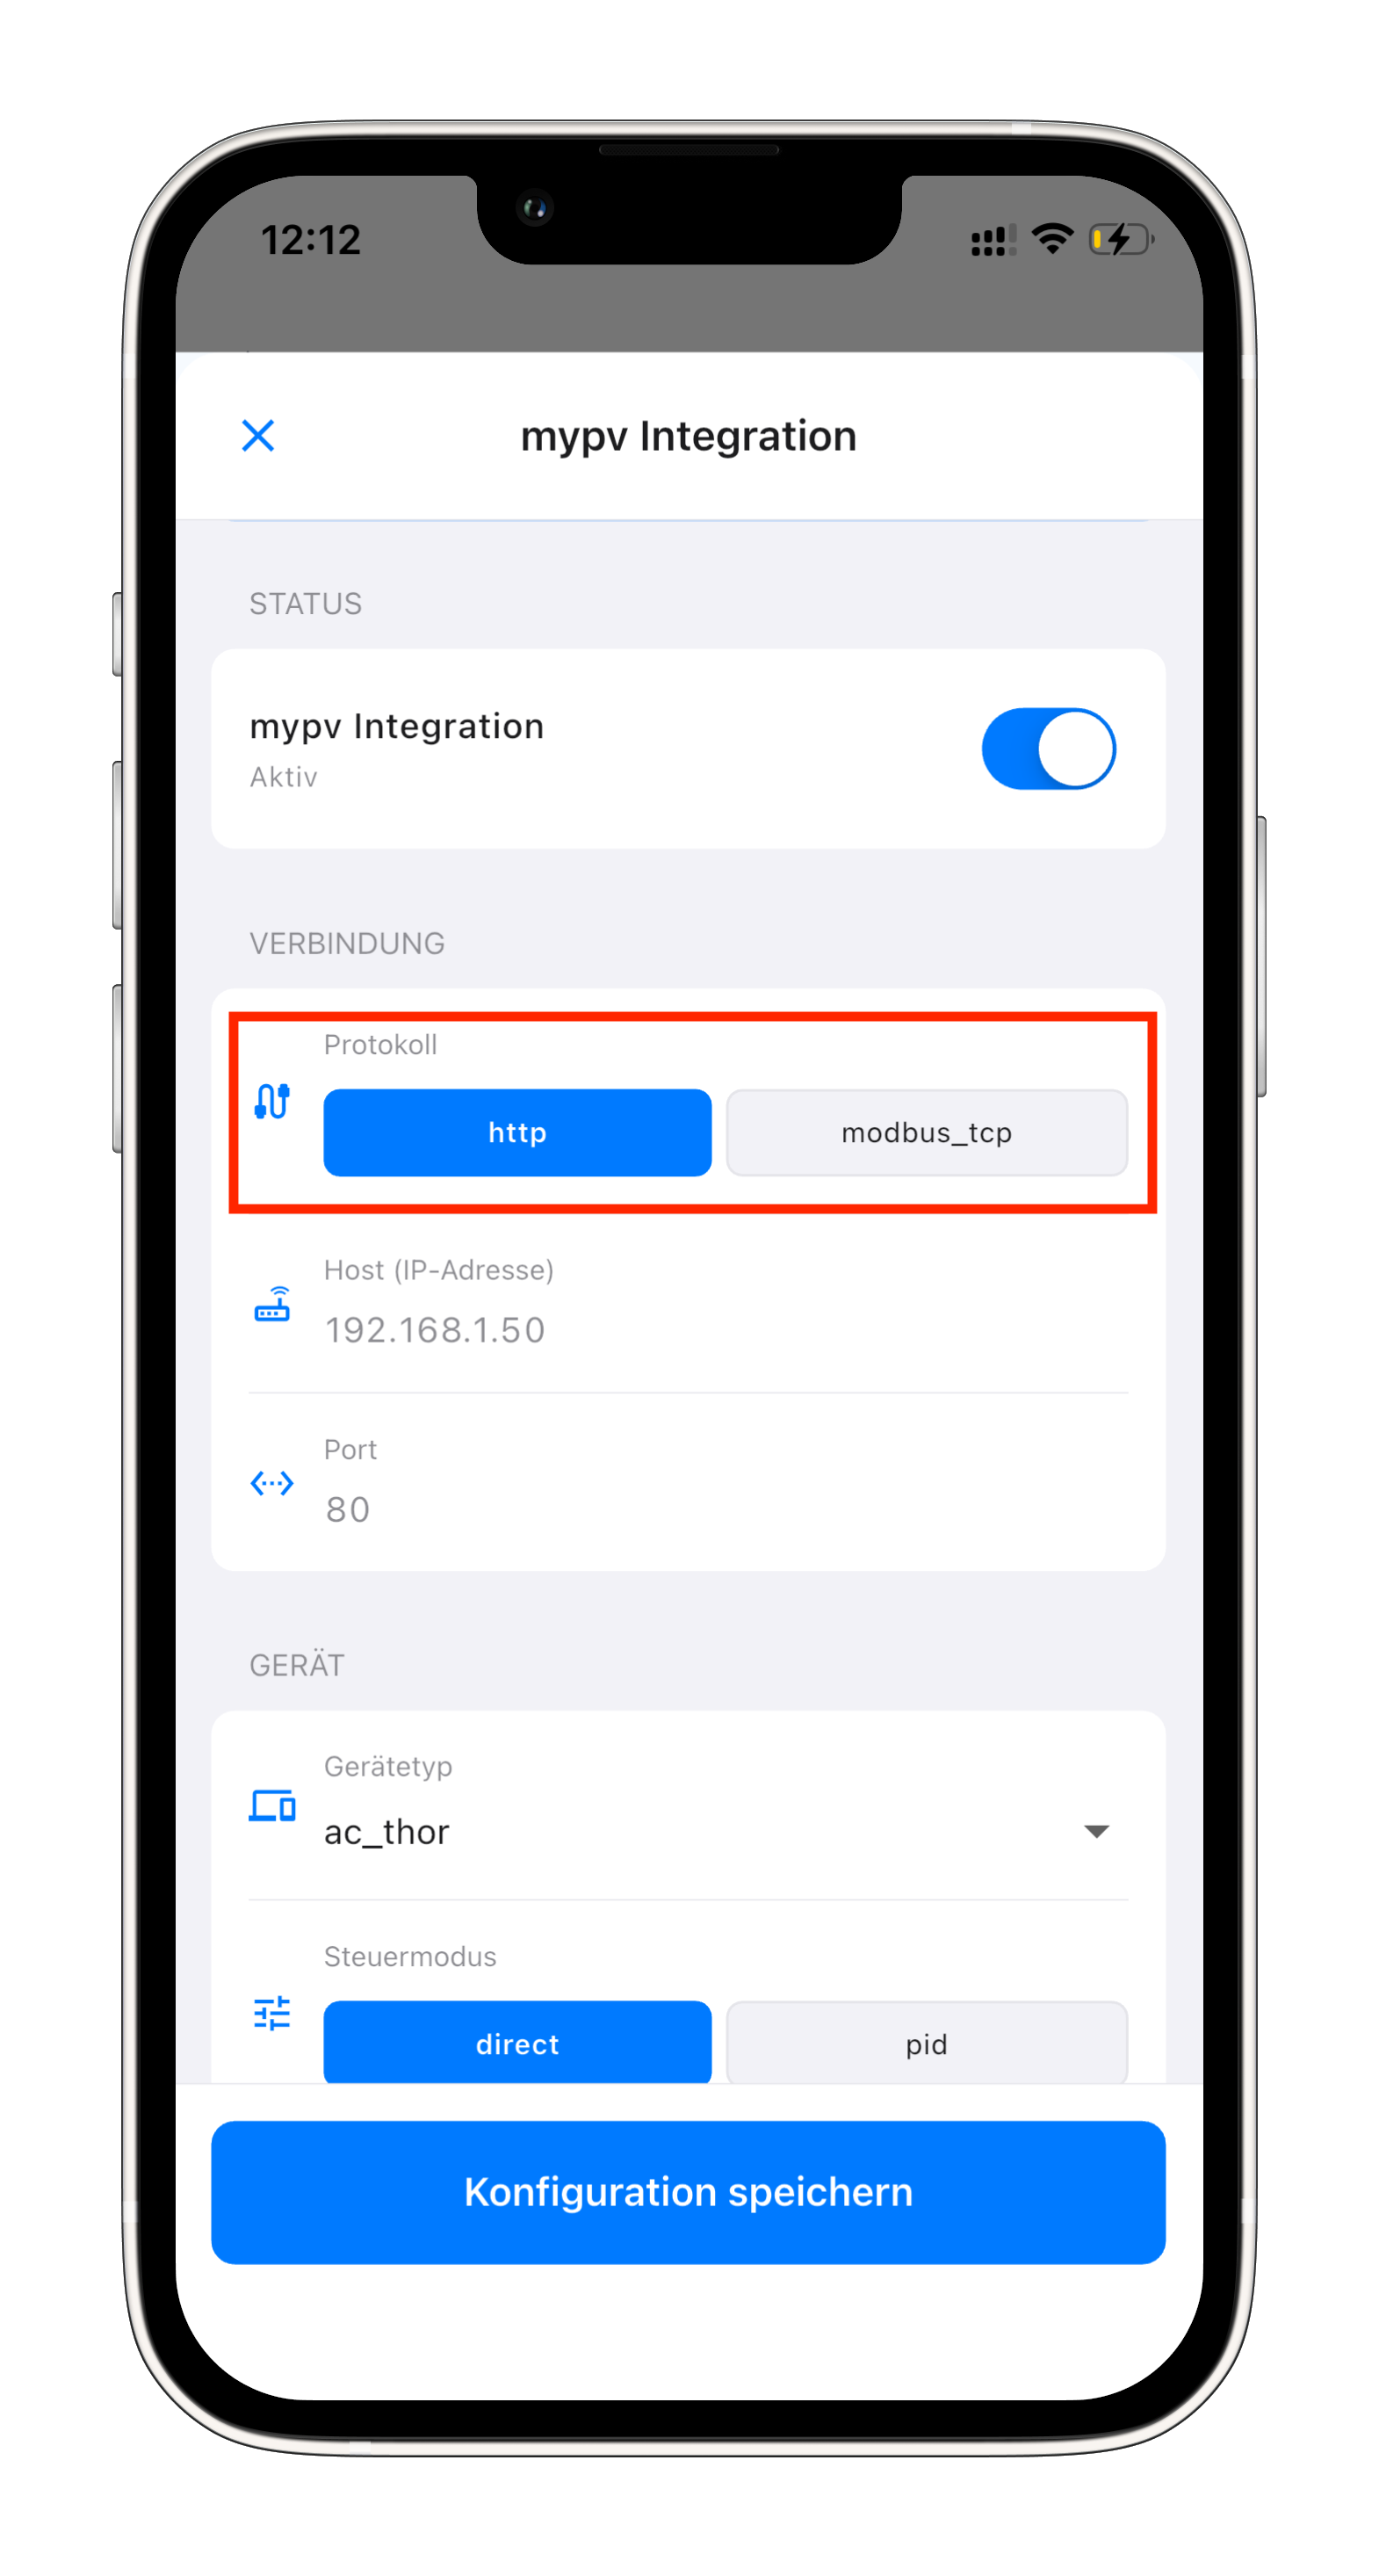
You can find the IP address in the device management dashboard of your myPV device.
If you chose modbus_tcp, port 502 is used automatically:
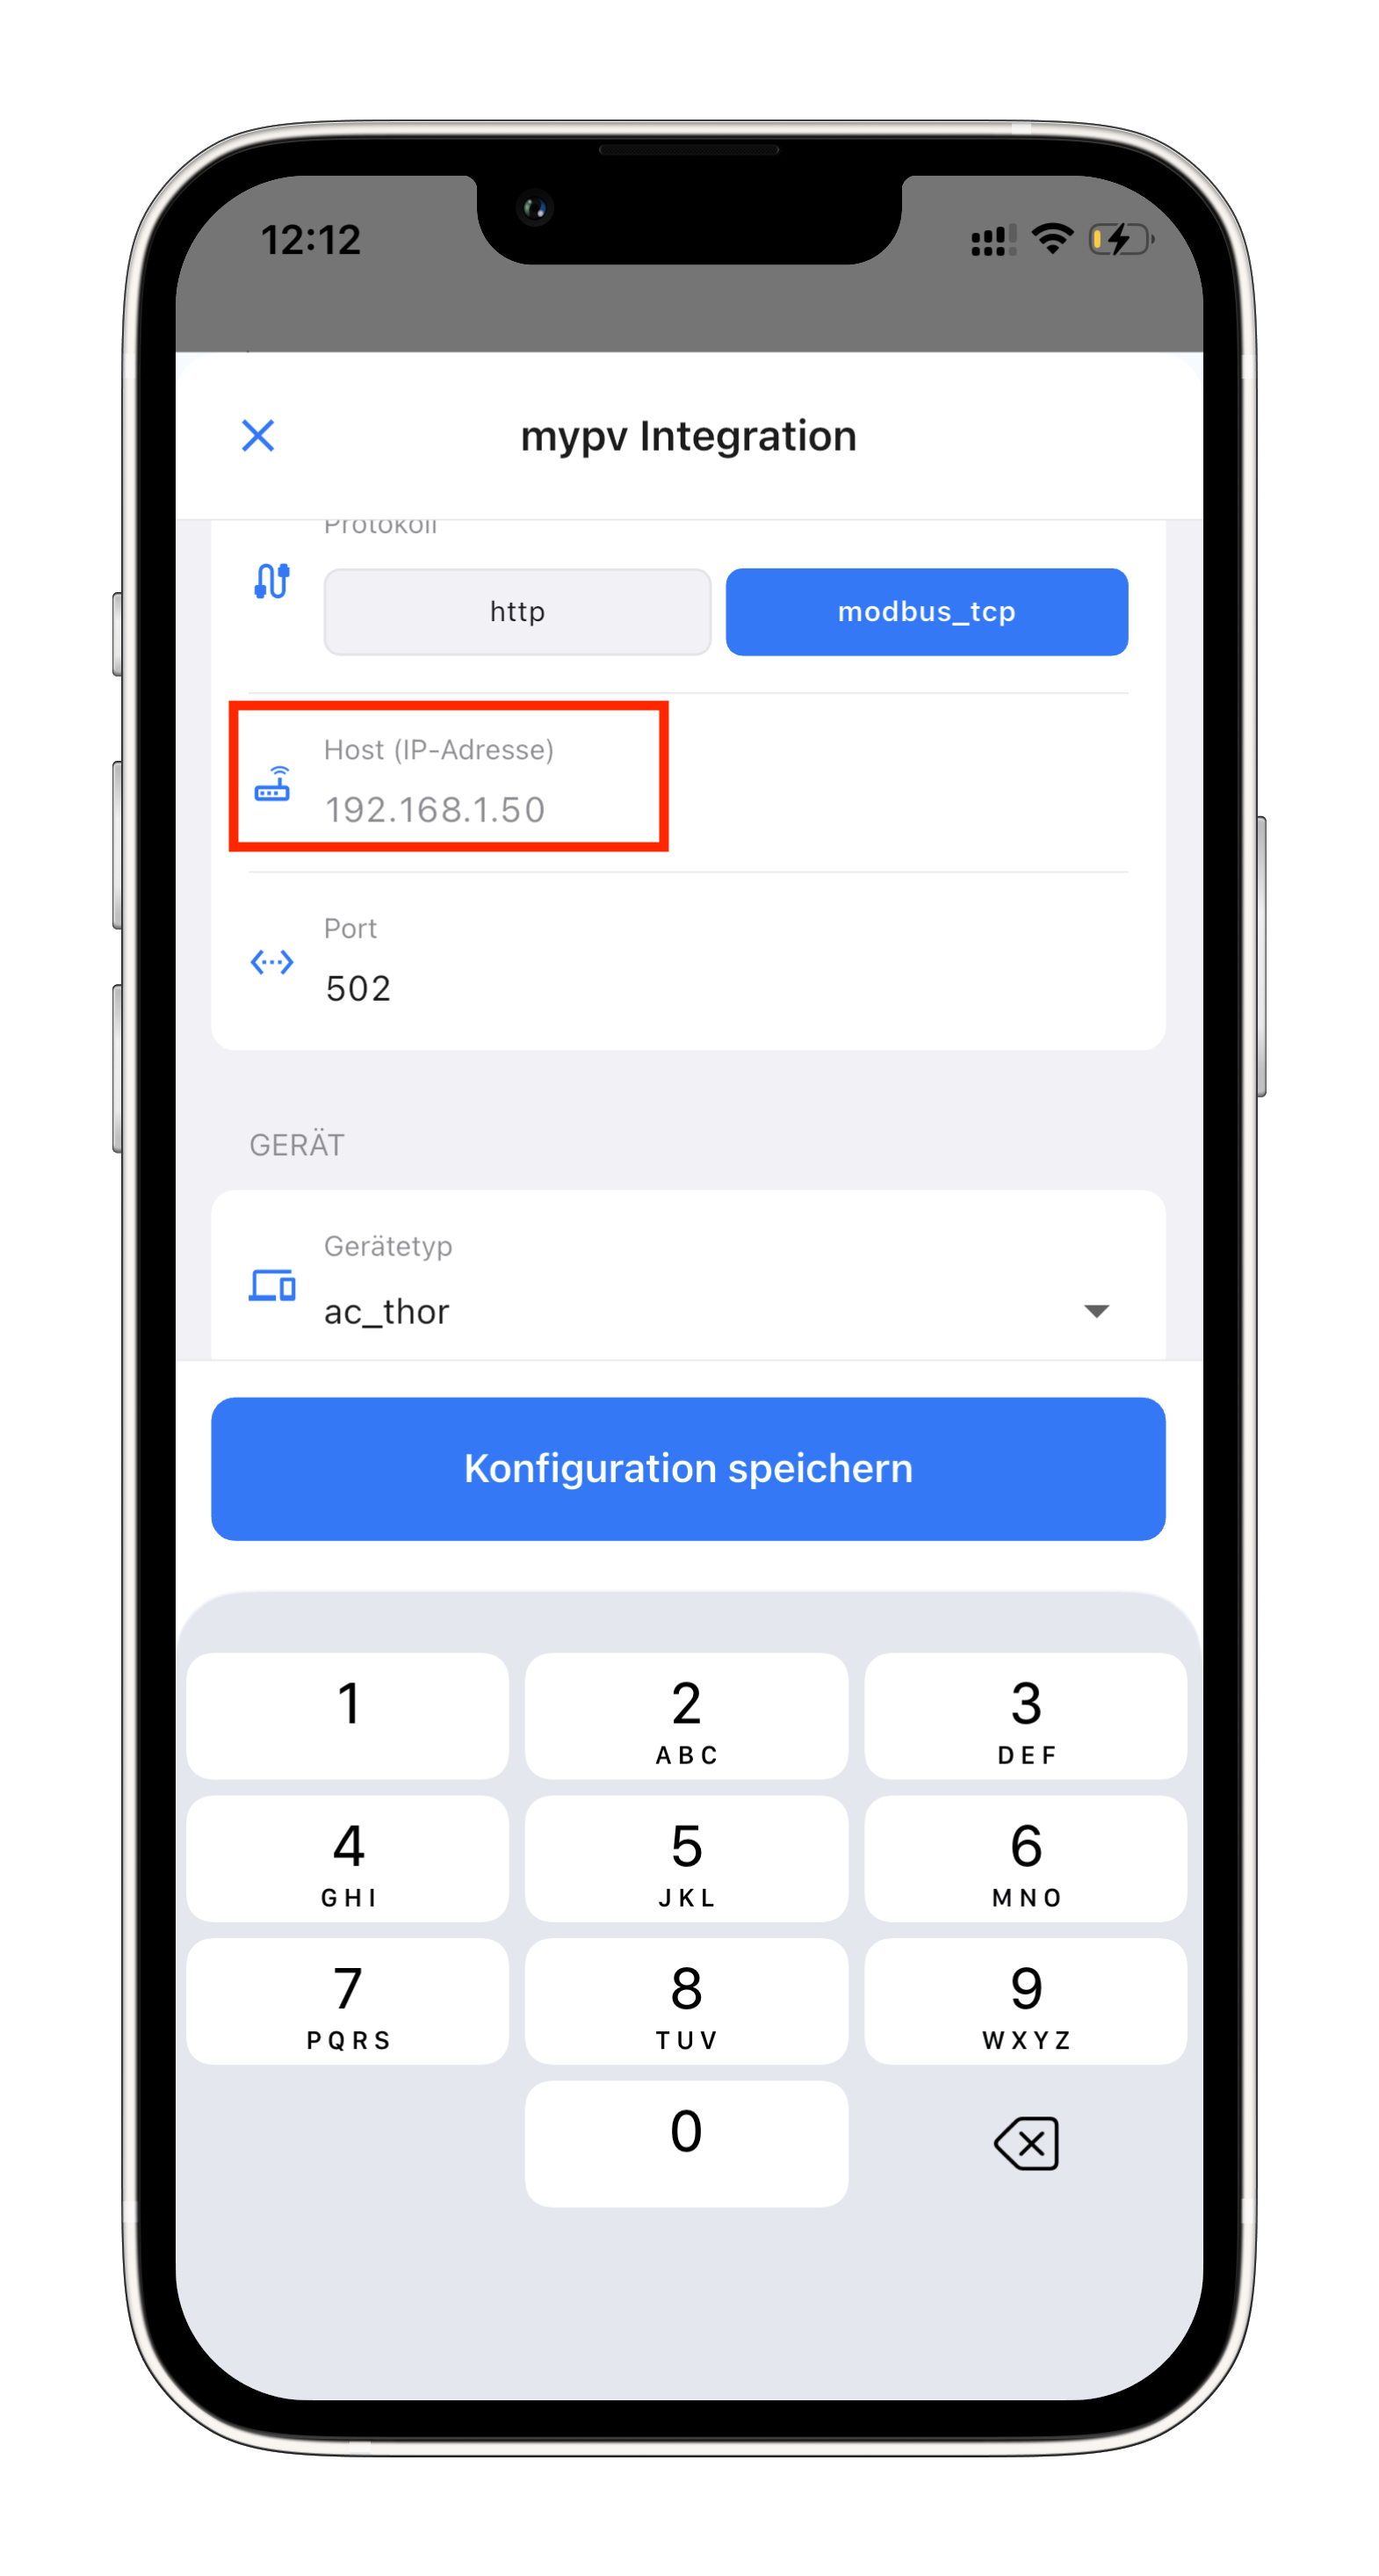
Step 6: Select the myPV device type
- Under DEVICE, choose your myPV device under Device type:
ac_thorac_thor_9sac_elwa_2sol_thor
Step 7: Save the configuration
- If needed, adjust additional settings (e.g. query interval, slave ID and power timeout for modbus_tcp)
- Finally, tap Save configuration
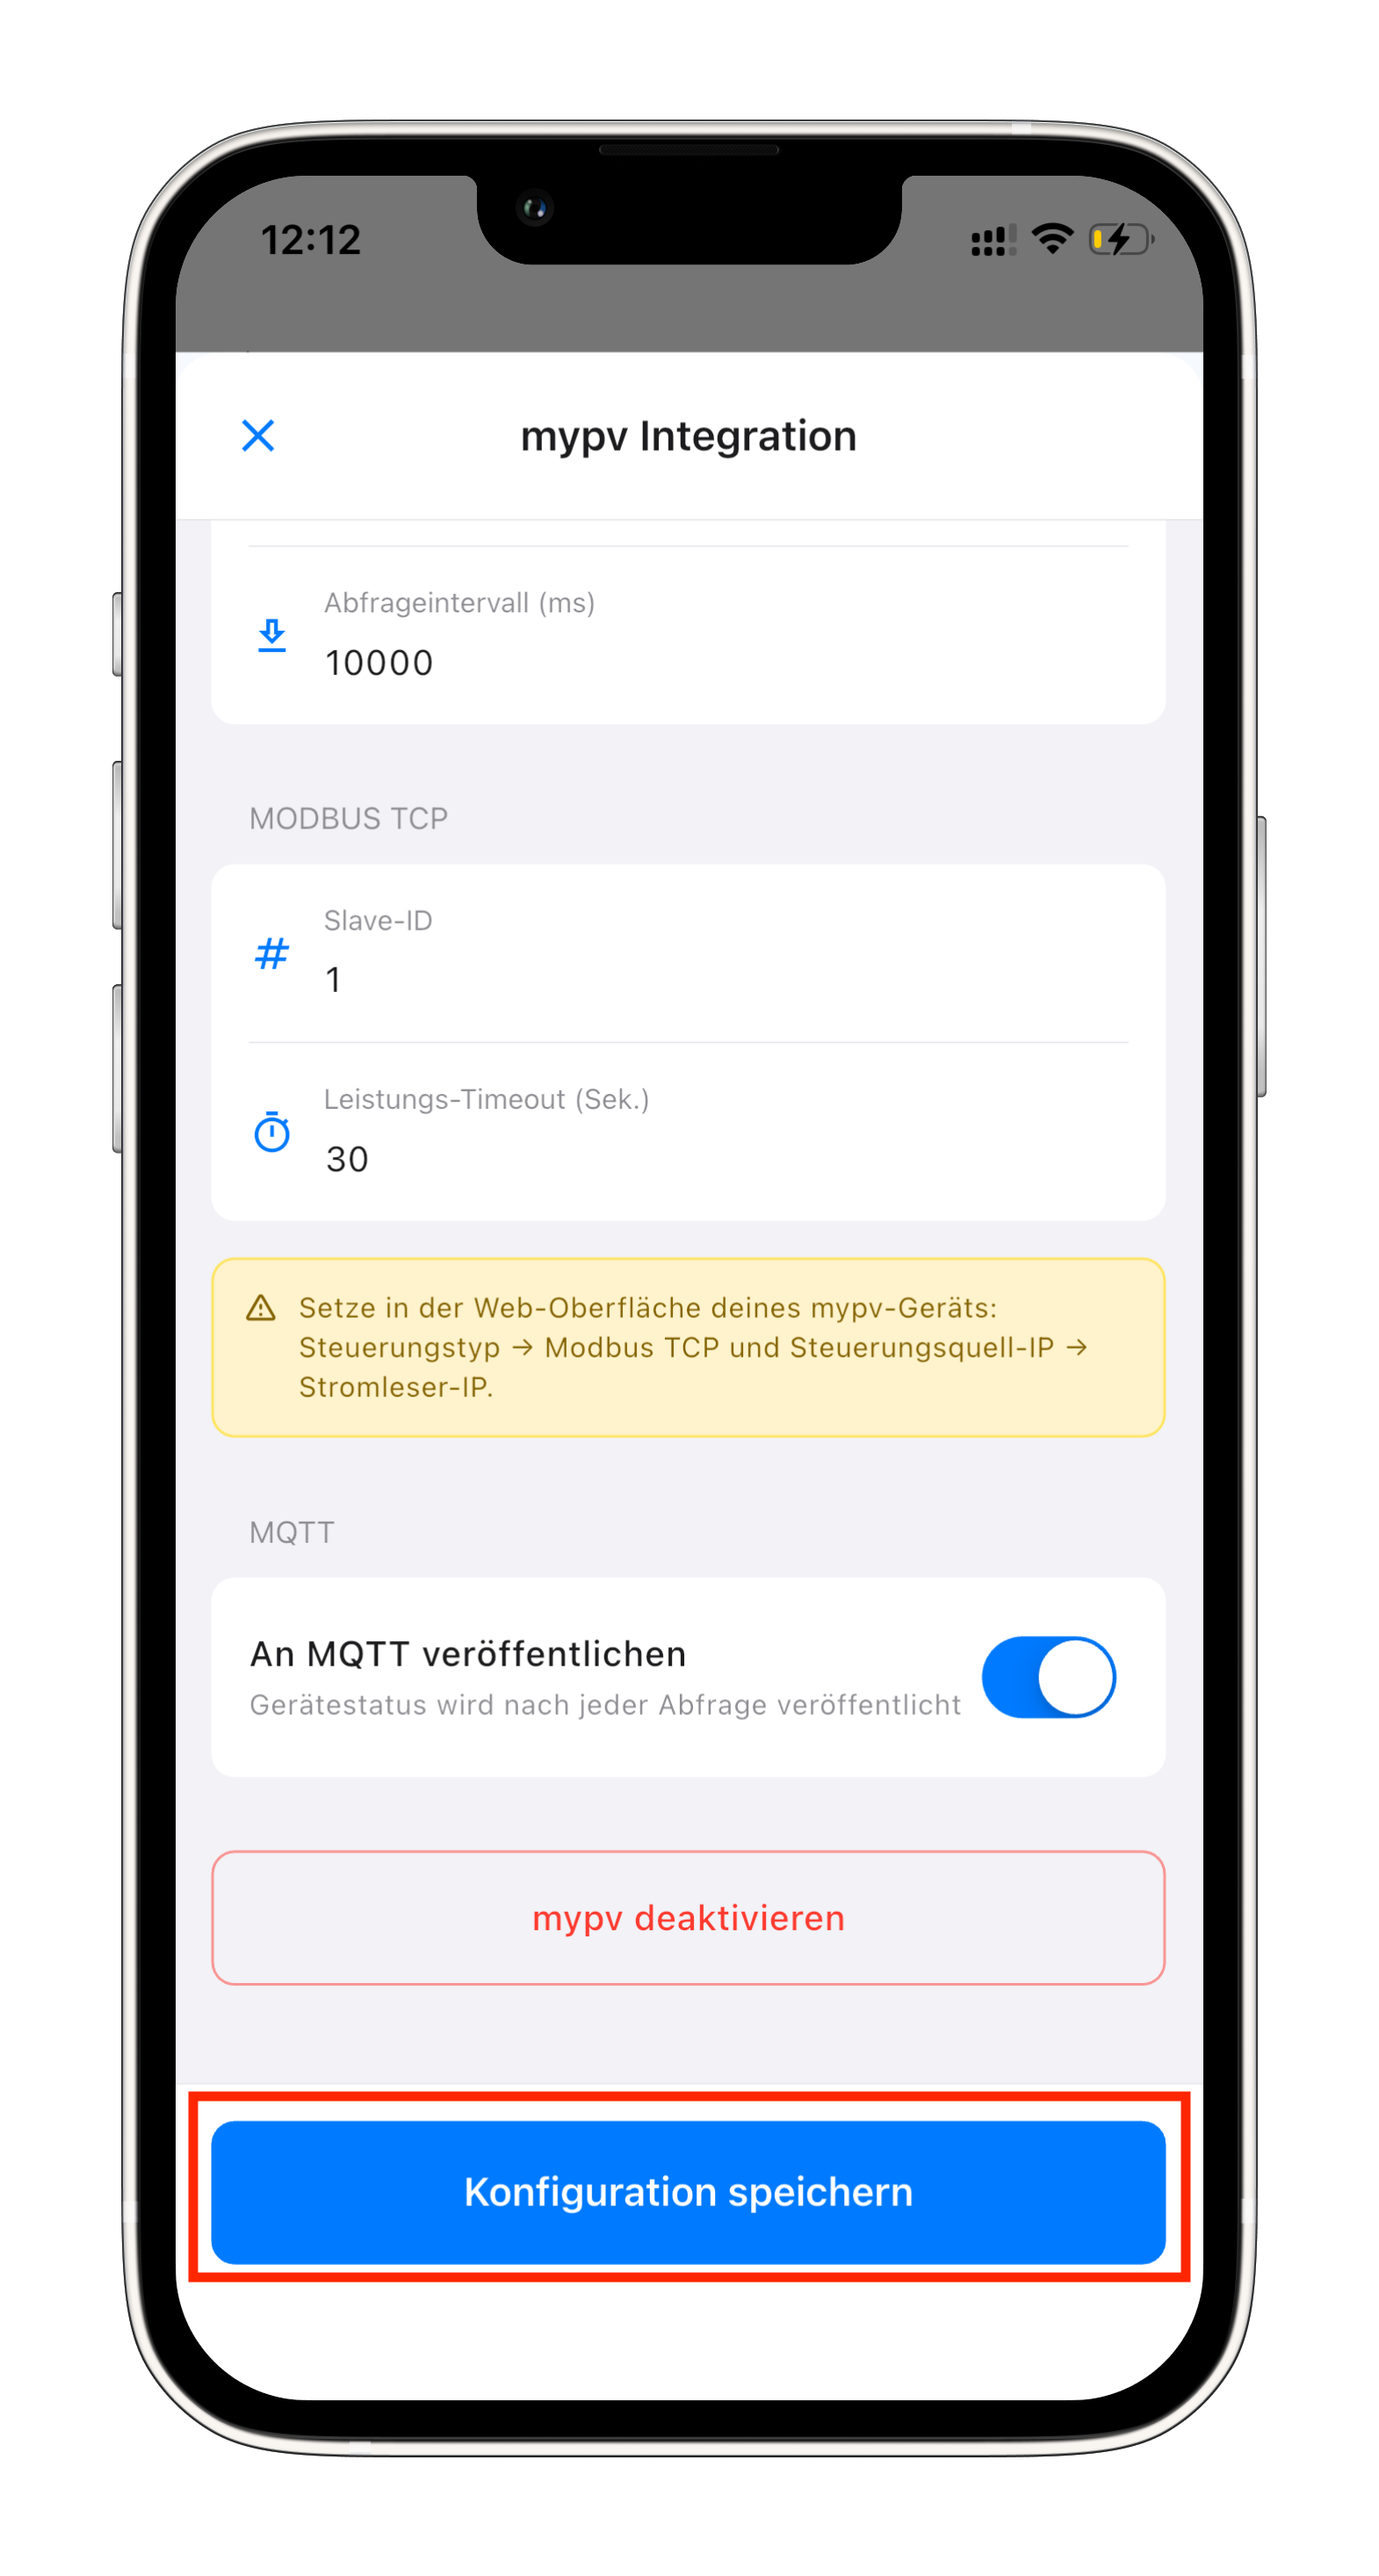
In the web interface of your myPV device, set the following values:
- Control type → Modbus TCP
- Control source IP → stromleser.one IP address
Setup complete
Your stromleser.one is now connected to your myPV device and continuously transmits the surplus power. This lets your myPV device automatically use your excess solar power.
All data and charts from the stromleser.one remain visible in the energieleser app, of course.
Common problems
No connection to the myPV device
- Check that the host address (IP address) is entered correctly
- Make sure your stromleser.one and your myPV device are on the same network
- Check that the port matches the selected protocol (http:
80, modbus_tcp:502)
Surplus is not being used (modbus_tcp)
- Make sure the control type is set to Modbus TCP in the web interface of your myPV device
- Enter the IP address of your stromleser.one as the control source IP
Wrong device type
- Check that you selected the correct myPV model under Device type (
ac_thor,ac_thor_9s,ac_elwa_2orsol_thor)